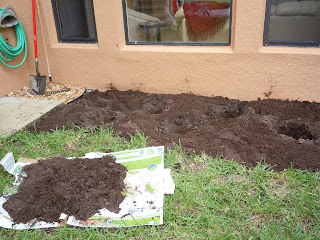
This is my first project since starting my blog, so I wanted to showcase the steps by step process of completing my project of planting a flowerbed in front of our entryway.
The view of the future flowerbed from the entryway.
First I laid out the area I wanted to be the flowerbed and using a hoe I ripped out all the grass and tilled the soil.
Since I have a small yard and not a lot of plants I've been using old cardboard to hold yard debris for taking to the curb.
I then laid out the plants how I wanted to be arranged.
I then dug holes big enough to fit the full plant base, watching out for sprinkler lines like this one, which aren't always where you think they are.
I put about half of the soil around the holes and half on another flattened cardboard box (or a wheelbarrow if you have one) to use to fill in around the plants.
I then rolled out landscape fabric, securing the edges, and cutting minimal slits over the holes to cover up to the base of the plant.
I first watered the holes to soak the roots, planted the plants, filled in the holes to match the ground level, wrapped the landscape fabric close to the plants to keep out the weeds, and wrapped the edging around the flowerbed, staking it into the ground.
*If the plant roots are so tight you can't pull the plants out of the pot, use gardening snips to cut the side of the pot and holding onto the bottom stem of the plant, pull the plant out of the pot over the hole, so the extra soil fills the hole.


No comments:
Post a Comment